
Quick start
You need OBS 28 or newer (it has the WebSocket server built in), a stream server your encoder sends to, and its stats URL.
1. Create a switcher
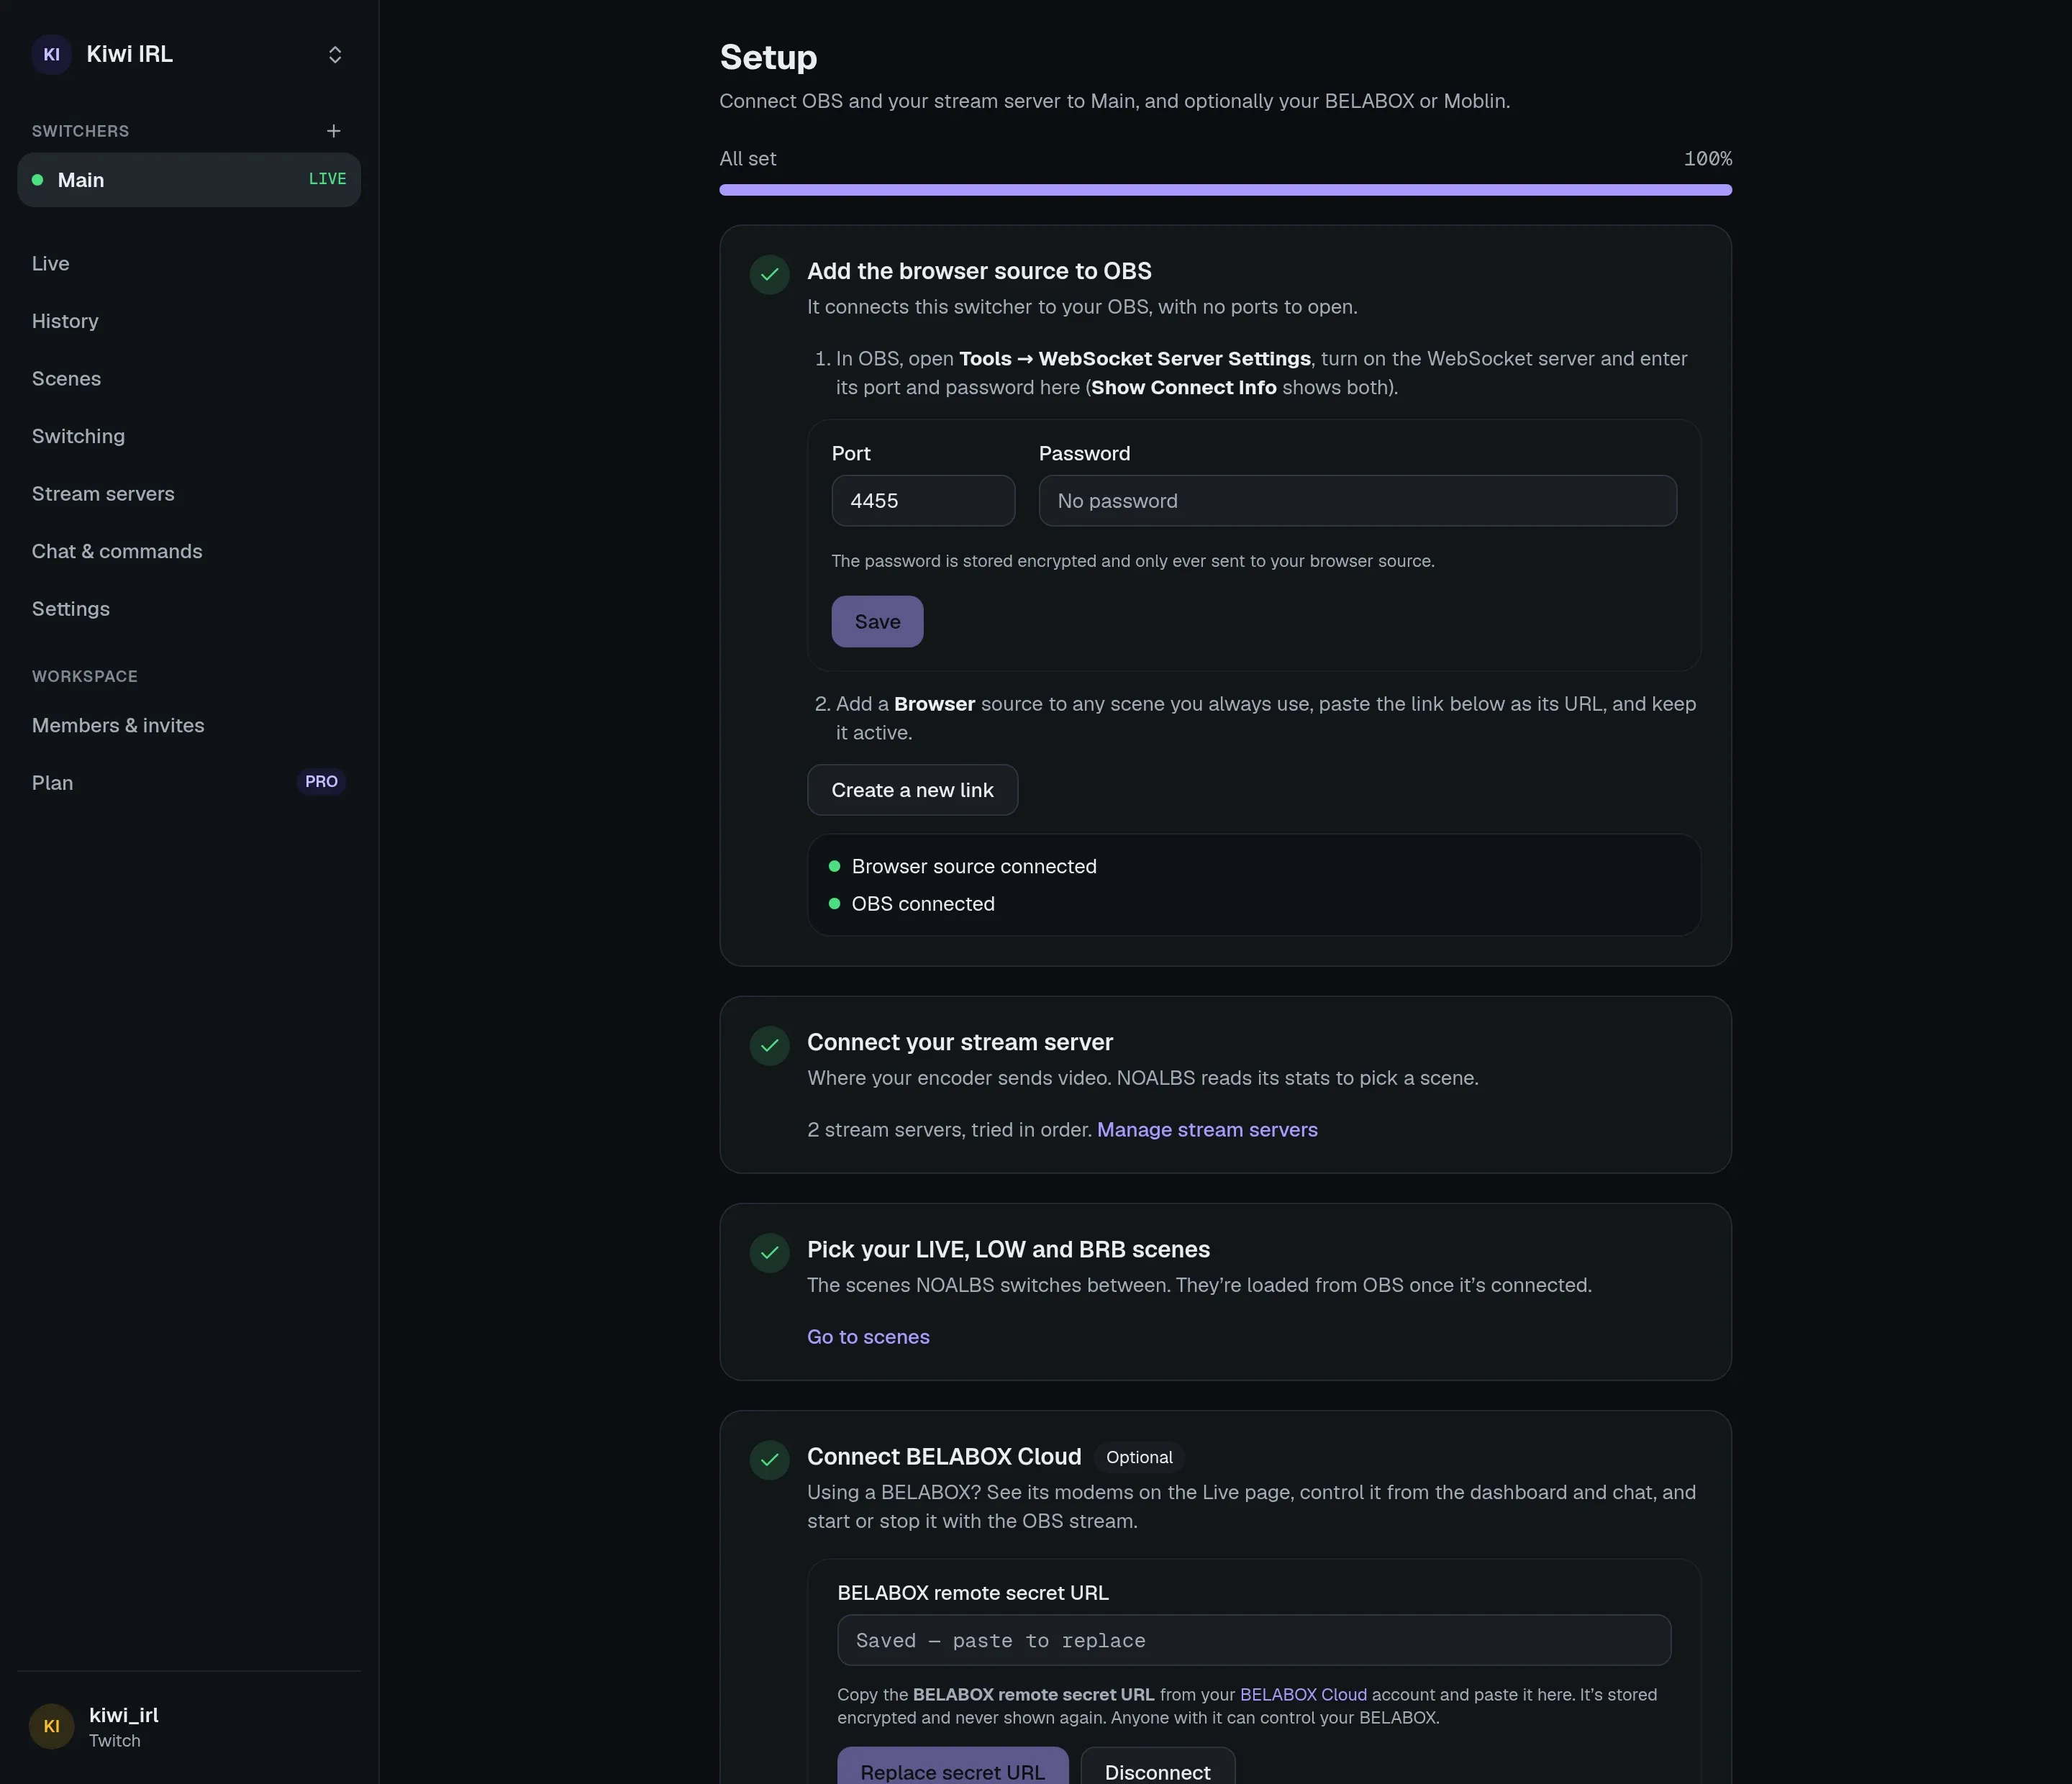
Section titled “1. Create a switcher”Sign in at noalbs.com with Twitch, Kick or YouTube. The first time, you create a workspace (a name and the URL it lives at) and then a switcher, which stands for one OBS setup. You land on its Setup page, which walks you through the rest and shows each step’s status live.
2. Let NOALBS reach OBS
Section titled “2. Let NOALBS reach OBS”In OBS, open Tools → WebSocket Server Settings and turn on Enable WebSocket server. Show Connect Info shows the port and password: enter them on the Setup page.
The password is stored encrypted and only sent to your browser source.
3. Add the browser source
Section titled “3. Add the browser source”Press Create browser-source link and copy the link.
In OBS, add a Browser source to a scene you always have open (any scene works, it doesn’t have to be visible), paste the link as its URL and keep the source enabled. Leave Shutdown source when not visible off.
The Setup page shows Browser source connected, then OBS connected. If it stays at “waiting for OBS”, check the WebSocket port and password.
4. Add your stream server
Section titled “4. Add your stream server”Press Add a stream server, pick its kind (BELABOX, MediaMTX, SLS, …) and paste its stats URL. Some kinds also need a stream key or publisher name. Test connection checks that NOALBS Cloud can read it.
Stream servers explains the options, and the list of kinds what each one needs.
5. Pick your scenes
Section titled “5. Pick your scenes”On the Scenes page, choose which OBS scene is your LIVE, LOW and BRB scene. The list comes from OBS, so it’s empty until OBS is connected.
That’s it. With the default settings NOALBS:
- switches to LOW at 800 kbps or below, or at 2500 ms RTT or above,
- switches to BRB when there’s no feed,
- waits for 5 bad checks in a row (one per second) before leaving LIVE,
- goes back to LIVE as soon as the feed is back,
- only switches while you’re streaming: it leaves OBS alone otherwise.
Change these under Settings → Switching; see Switching.
- Connect your chat for
!bitrate,!switchand the other commands. - Connect your BELABOX or Moblin, if you use one.
- Invite your moderators: Workspaces and members.